
Course Editing Guide
Frequently asked questions by course editors and quick videos about common administrative functions of Moodle
Create Activities (give tasks to students)
How to create groups and set up group work for activities?
The Groups feature allows you to divide the students in your course into different groups to easily separate them. Students can use Moodle activities as members of these groups afterward, allowing them to work together closely.
- You can change forums into group forums - allowing you to communicate with the members of each group separately.
- You can gather assignments from teams
- You can restrict activities/resources to be available/visible for only members of one group, not the other.
- If graders with the "non-editing teacher" role are assigned to the groups as well, this feature can be used to restrict them to see/grade only students in their groups. This can be useful for thesis supervisors.
I. HOW TO CREATE GROUPS
It is important to set up the groups before releasing an Activity using them.
Step 1:
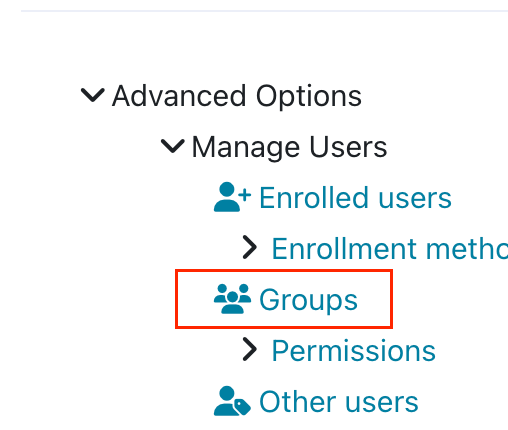
Go to the Participants menu and select Groups directly or from the "manage users" menu in the Administration block > advanced.
 |
 |
|---|
Step 2: Create the Groups
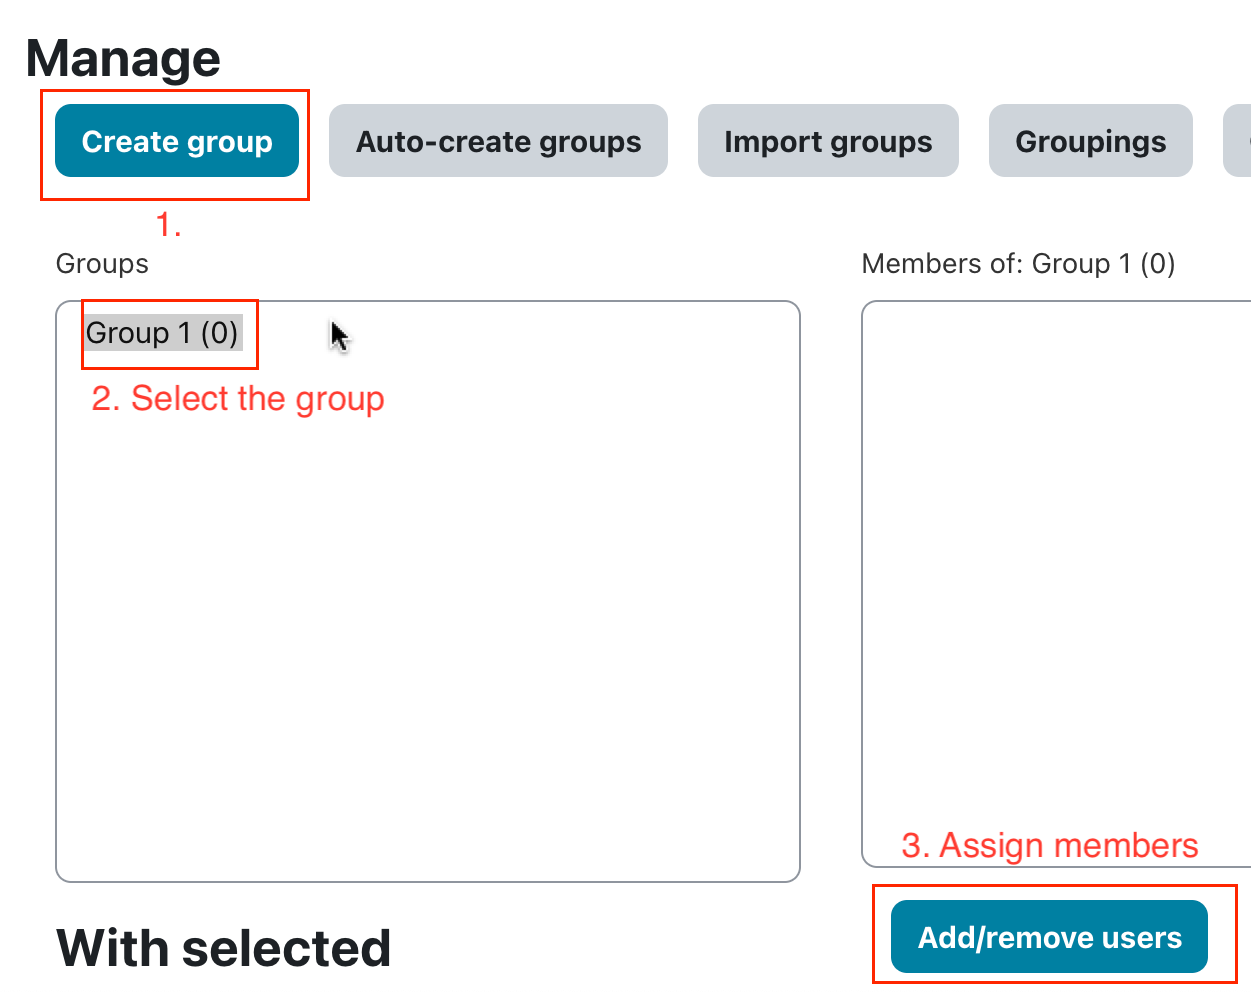
You will see a screen with two columns: Groups and Members. If no groups have been set up, both columns will be empty. Create each group by clicking the Create Group button, typing a name into the Group name field and clicking Create group.
The other fields are optional, most of the time can be ignored. The new group then appears in the left-hand column. Alternatively you can use Auto-create groups. This option can create multiple groups and assign students randomly.
Naming scheme: @ (A,B,C) or # (1,2,3)
Auto create based on: Number of groups or Number of students - then add the count.
So if the course has 15 students and you select 3 groups, 5 students will be assigned randomly.
Step 3: Add users to the Groups
This process is manual and is dependent on the students having already enrolled on your course.
Select and highlight the group you want to set by clicking it once.
Click Add/Remove Users button on the right.
You will see lists of existing (left side) and potential (right side) members.
In the “Potential members” list, select the users you want to add to the group (hold down the Ctrl key to select multiple users). Then click the add button to add them to the group.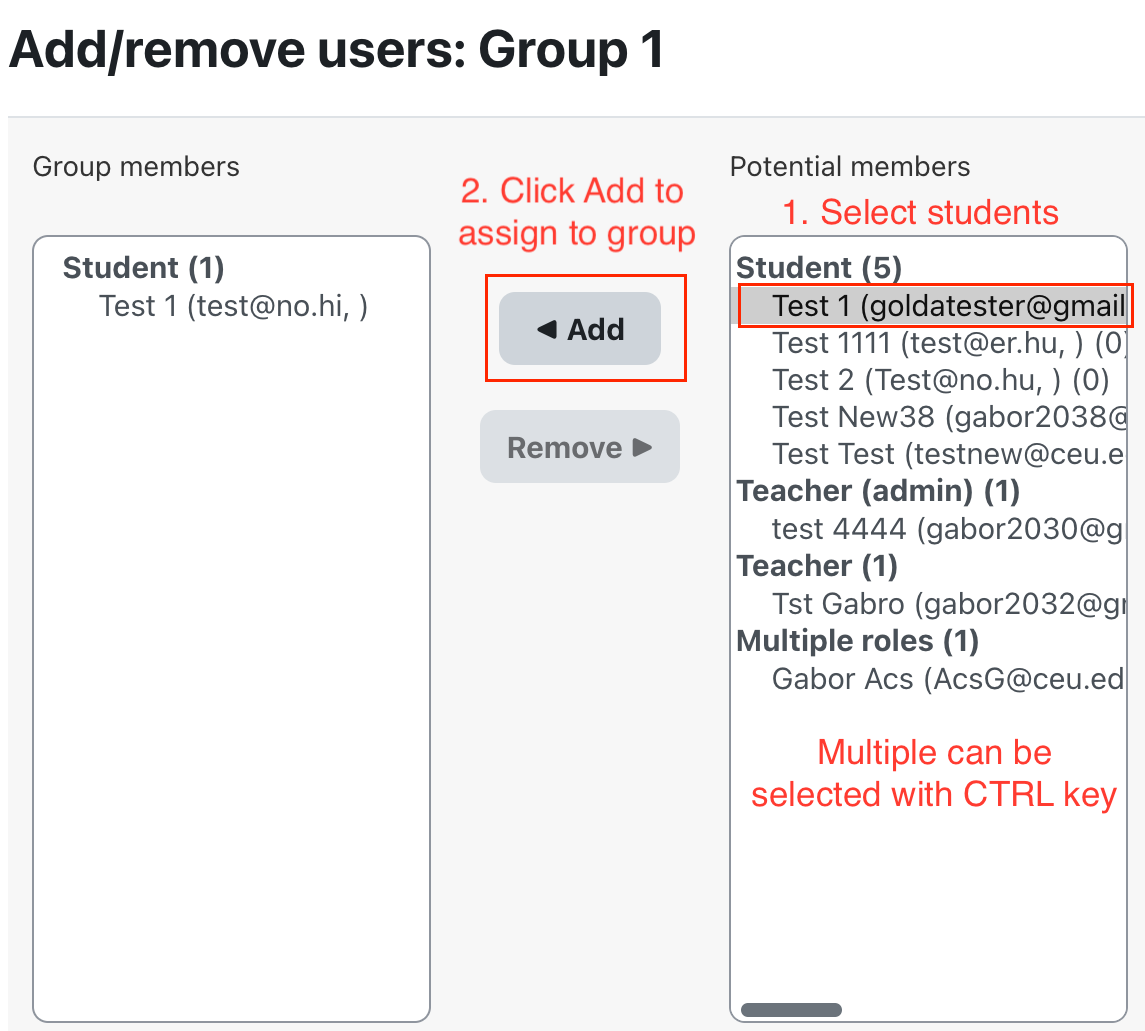
Repeat these steps for each group you want to use. You can add a single user to multiple groups if it is needed.
Make sure that no students are left out - as it will mean that they cannot take part in the activities set for group work.
Note: You do not have to add teachers (or TAs or Teacher admins) to any groups by default, teachers can check all of them.
Non-editing teachers can be assigned if you would like for them to be only to see and grade their students at assignments. Can be useful for thesis supervisors for example.
Note 2: Students will not be notified about this automatically, and not able to see the Groups menu. You need to notify them by other means (like by using the Main course forum).
Note 3 - Group Choice: this is a separate activity what can be used to allow students to select their own groups instead of assigning them manually. You just need to fill the mandatory fields and add the maximum number of students allowed in each group.
Details about group choice
Note 4 - Groupings (set of groups)
Sometimes you will not use the same groups of students for the whole course and you will need a different setup for different activities. The Groupings function is designed for this purpose. A grouping is a collection of groups within a course, also used to restrict access to an item to a subset of students.
Details about Groupings
II. USING GROUPS
After the groups are created, you can use them for activities in the course. To make the created groups take effect, you need to edit the relevant activities and apply the group settings.
Option A) - Restrict the activity to only one group
After the groups are ready you can edit any activity or resource with EDIT > edit settings, scroll down to the "restrict access" tab, select "add restriction" > group (select the group), and save. This activity will be available for only the selected group from now on.
This can be used for any activity, even for resources like text and readings.
Option B) - Set up group work for the activity
All groups will be able to use the activity, but they will be separated from each other.
- To change a forum into a group forum > edit the settings of the forum > select the "common module settings" tab and change the group mode into separate groups.
Note: Alternatively the visible groups allow students to see all discussions, but only participate in their own groups topics.
- If you use this "separate groups" setting for assignments, you can restrict non-editing teachers to their own students. Students still submit individually. Other teaching roles can be used as well, but if this is the case their permissions need to be modified (as teachers can view all groups by default). For this, please ask for assistance.
- It is not that common, but other activities can also utilize this setting, where students work together, such as Choices or Wikis.
- For assignments, edit settings > open the "Shared (team) submissions" and select the "Students submit as teams" option makes "team submissions" possible (so the submissions are shared).