
Course Editing Guide
Frequently asked questions by course editors and quick videos about common administrative functions of Moodle
Create Activities (give tasks to students)
Groupings - different set of groups in one course
Advanced Material – Groupings
Using different sets of groups & restricting access to items
Sometimes you will not use the same groups of students for the whole course and you will need a different setup for different activities. The Groupings function is designed for this purpose. A grouping is a collection of groups within a course, also used to restrict access to an item to a subset of students.
For example, you may create a set of groups for the course in general and a separate set for a particular project.
How to set up Groupings
To use Groupings you must first have created at least one group (see the process on the previous page).
- Click on the Groupings tab at the top of the Groups page.
- Click the Create grouping button, type a name for the grouping and save changes.
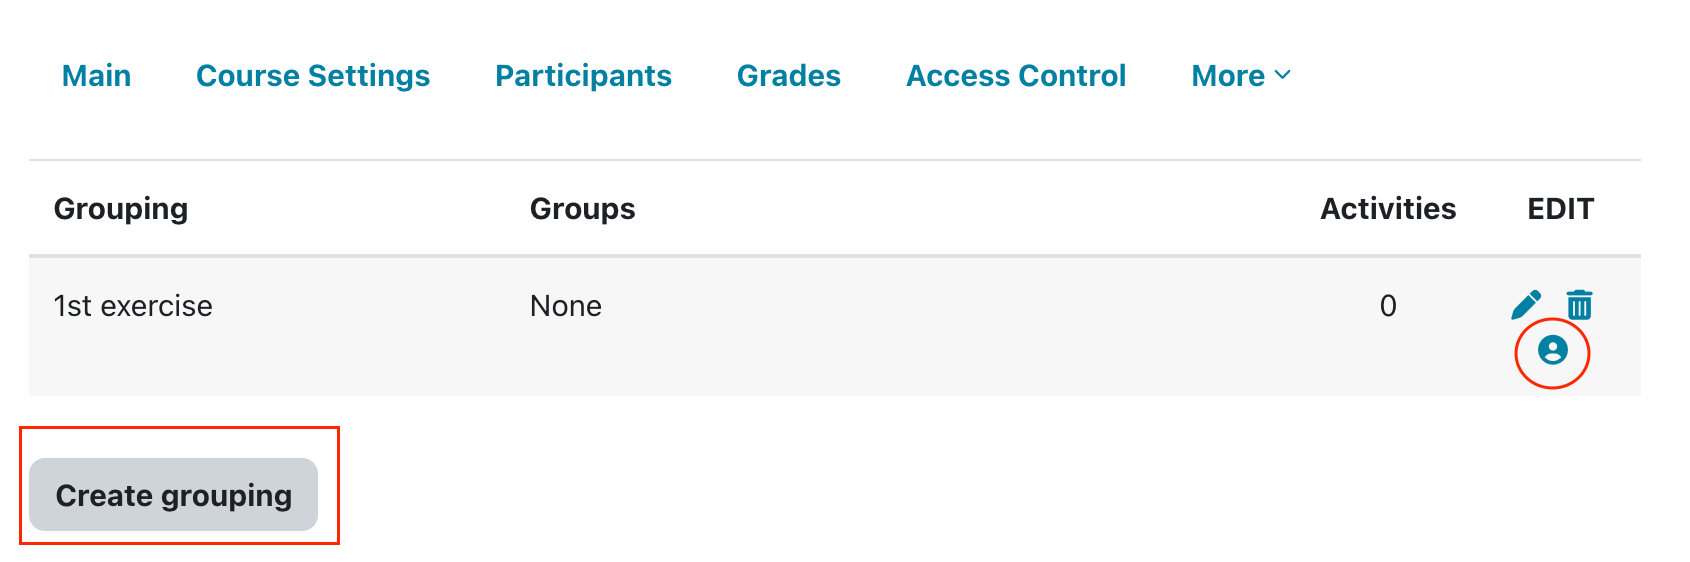
- Add groups to the grouping:
- On the Groupings page click the Assign icon in the edit column.
- Use the Add button to place the appropriate groups into the grouping.
- Apply a grouping to an activity or resource:
- Go to the activity or resource and click on the Edit icon next to it.
- Scroll down and open Common module settings and set Group mode to separate groups as a prerequisite. Then select the appropriate grouping, then click Save and return to course.
If a grouping is selected, then all users assigned to the groups within the grouping will be able to use the activity, but they will still work by groups in that activity as usual.
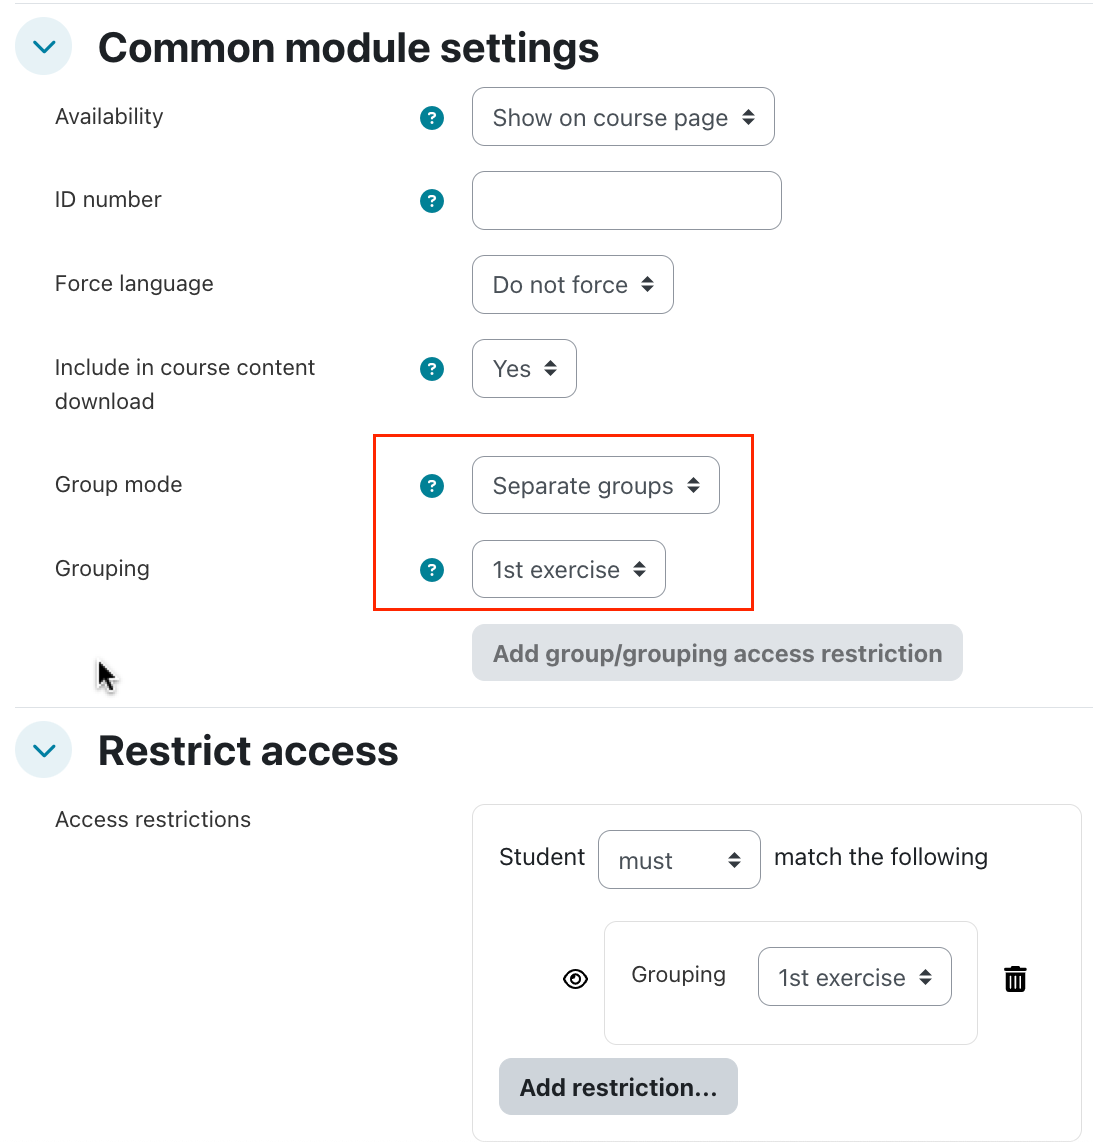
Note: If you click on the "Add group/grouping access restriction" button, then the activity (or resource) will only be available to users assigned to groups within the selected grouping (or to any group member if no grouping is selected). For other users this activity will be completely invisible.
Examples for Groupings
Example 1 – Not all students need to participate in all activities
You have 12 students and 4 different projects. Six different students work on each project, and all students will take part in 2 projects.
- Create 4 groups (Team 1, 2, 3, 4) and assign the appropriate students:
- Team 1: A, B, C, D, E, F
- Team 2: G, H, I, J, K, L
- Team 3: A, B, C, G, H, I
- Team 4: D, E, F, J, K, L
- Create 4 groupings (Project 1, 2, 3, 4).
- Assign the groups to the groupings (Team 1 → Project 1, etc.).
- Create an individual forum for each project (4 forums total). In each forum:
- Set Group Mode = Separate Groups
- Select the appropriate Grouping (e.g., Project 1)
- Check Available for group members only
Result: Each student will see only the 2 project forums they are members of and will be able to work with only the other team members for that project. You will see all four groups and easily supervise the work in them.
Example 2 – Everyone participates, but group composition changes
Now suppose you have the same 12 students and 2 different projects. All 12 will take part in each project, but with different groupings.
- Create 6 groups (Teams 1–3 for Project 1, Teams 4–6 for Project 2):
Project 1 groups:
- Team 1: A, B, C, D
- Team 2: E, F, G, H
- Team 3: I, J, K, L
Project 2 groups:
- Team 4: A, E, K, D
- Team 5: B, I, H, J
- Team 6: G, L, F, C
- Create 2 groupings (Project 1, Project 2).
- Assign the groups to the groupings (Teams 1–3 → Project 1, Teams 4–6 → Project 2).
- Create an individual forum for each project (2 forums total). In each forum:
- Set Group Mode = Separate Groups
- Select the appropriate Grouping (e.g., Project 1)
Result: Each student will see both project forums and will be able to work with the appropriate teammates for each project.