Course Editing Guide
Frequently asked questions by course editors and quick videos about common administrative functions of Moodle
Basic Course Editing
The Moodle text editor and accessibility
The editor auto saves every minute, so if you close the window by accident, or some technical error occurs, most of your work will not be lost.
If you are modifying existing content, and something goes wrong, most of the time the best practice is using the undo button.
What can you do with this editor?
Drag and Drop
You can drag and drop most content from your computer into the editor box. The most useful content to drag in are Document files or images.Copy / Paste
You can also copy/paste text into the box, but you need to be careful with this.
- If you paste in formatted text (from MS word for example), it may break the formatting. To prevent this, either use the "Paste special"
 icon ( Details ) or highlight the copied text and clear the formatting
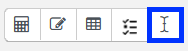
- You should not paste in links from a different course. If you do this, the links will point to the original course, and students will not have access to the linked content. Use import instead.
Formatting
Many of these icons and functions should be familiar to anyone who uses a word processor. You need to highlight the text you would like to change, and select the relevant icon to make the text Bold, change the color, etc.
Many of the icons are rarely used, but can be useful for specific cases, like the Table, or Equation editor, we will not cover these here, you can find details at Moodle.org.
Other important functions
Please see the icons for these below at the image.
1. Add a link / upload a file
Highlight the text where you would like to put the link, and click on the icon ![]() . A popup window will appear. Type in the link or click on Browse repositories and upload a file from your computer and save. Most of the time it is recommended to tick the "open in new window" box.
. A popup window will appear. Type in the link or click on Browse repositories and upload a file from your computer and save. Most of the time it is recommended to tick the "open in new window" box.
2. Change into HTML mode (embed content) ![]()
This can be useful, if you are an expert in HTML to edit the source of your content, or more commonly to put some external content embedded into the course - for example a youtube video. Open the external content in an another window, copy the embed link, then come back to the Moodle editor. Change into HTML mode and paste the code in and save.
- Keep text formatting simple and consistent across your course. Start with plain font in the default size or larger, and use bold and italics sparingly. Left-aligned text is generally most readable.
- Avoid light-colored text on a white background. Ensure that there is good color contrast between the text and background.
- Use the hyperlink button in the toolbar to link text rather than pasting the full URL. A link such as http:///www.ceu.edu/.... adds visual clutter to the page and creates barriers for students using assistive technology like screen readers.
- Add Alt text when uploading images- this is a textual description of an image for participants who cannot see it. For example, if you post a diagram of a key concept, but sure to describe textually the most important features of the diagram in the Alt text box.