Course Editing Guide
Frequently asked questions by course editors and quick videos about common administrative functions of Moodle
Basic Course Editing
How to upload readings/materials?
1. The most convenient way to upload files is the drag and drop method.
Start with TURN EDIT mode ON ( click on the button at the top right corner of the course header)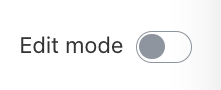
After this, you will be able to drag and drop files from your computer into your course.
Important note:
Be mindful of content that you upload to Moodle and make sure you have the rights to share the content. If you have questions about a specific material to share, contact the CEU library.
Detailed help about this:
https://ceu.libguides.com/moodle
If you experience any problems:
- Make sure that you are using an up-to-date browser: Chrome Firefox , Safari (IE is not supported anymore)
- The max. file size of any file uploaded is 50 Mb by default (you can change this at the "course settings").
- Make sure that the Editing is enabled (Edit mode)
- Check if your internet access is stable. Uploading large files can be really slow compared to browsing pages, so Wifi access can cause problems here.
2. Alternatively you can use the menu to upload a file (but it takes more time)
Select the "Add an activity or resource" link at the appropriate section.
Select " Single File" from the resources tab
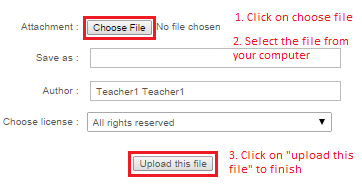
Fill in the "name" field, then select the upload icon > Choose a file > Select the file on your computer and click the “Upload this file” button and save.

3. Folders
A folder allows a teacher to display several readings together. With the drag and drop method, you have to Zip the files on your computer, and drag the Zip files in or use the Add an activity or resource menu, select "multiple files", fill in the name field, and drag or add the files one by one before you save. (Add an activity or resource > folder)
4. Upload limit
Generally
the largest file you can upload is 50MBs. If necessary, you can change this
limit to 500MBs at the "course settings" menu in the administration.
Help