Coordinator Faq
| -: | CEULearning |
| Course: | CEULearning |
| Book (multi-page text): | Coordinator Faq |
| Printed by: | |
| Date: | Wednesday, 8 July 2026, 3:16 AM |
1. Course creation
Creating courses from the SITSsync list
For regular courses, please use the SITSsync course list instead of creating courses manually. Manual course creation should only be used when the course is not available in the SITSsync list.
Open the SITSsync list here: https://ceulearning.ceu.edu/local/sitssync/view.php
The courses for the coming academic year should be available from July. Please create courses only after the data you see is correct and no further significant changes are expected.
Courses are grouped by term, so you can review and save Fall, Winter, and Spring separately. The courses that should normally be created are checked by default, based on previous data. If a course should not be created, remove the checkmark before saving.
The import checkbox means that previous course content should be copied into the new course. If a different previous course should be copied, leave a comment.
Please use the comment field for special cases, for example:
- multiple Moodle courses are needed, although SITS lists only one course;
- no SITS synchronization is needed;
- the course has several SITS groups, but only one Moodle course should be used for all groups;
- the previous course to copy is not the obvious one.
After you save the form, the Moodle admin receives an automatic notification. Once the courses are created, they move from the SITS list to the Created list.
Academic Writing courses: these may need extra checking because the SITS data may be inaccurate. If you are unsure whether they are final, please leave a comment or wait until the Academic Writing details are confirmed.
Manual course creation
1. If the course is not available in the SITSsync list and needs to be created manually, go to the relevant category of your department (if necessary, create the category first - use the same naming style of your department https://docs.moodle.org/35/en/Course_categories#Adding_a_category )
2. You will find the "Add a new course" button below the course list. (if you can not see this button, you do not have rights in that category)
For multi-group courses, please read this guide first.
Mandatory fields
- Full name: This is the course title - This must be a unique name on the Moodle server. You should always indicate the Year/term at the end (2021/22 Fall). For multiple groups, you should indicate this as well.
- Short name: Short title (this will show up in the “breadcrumbs” listing) If it is not unique, the system will prompt you for a different name when you try to save your settings. It is recommended to use a name you and your students will be able to easily identify.
- Category: You can select which the folder, where the course will be located. By default this will be the category where you clicked on the Create a new course button.
- SITS sync code: This code is needed to establish the connection with SITS - so all registered students and instructors will get access to their registered courses automatically when they log in to Moodle.
You can find this code in SITS called Moodle sync code. The format has a strict logic, so you can always add this code if you know the course code.
The code has 4 parts without any spaces. put together:
- course code: ENVS2323
- a letter indicating the group. For most courses, it is a higher case letter A, if there are multiple groups, for group 2 it is B, for group 3 it is C
- the year 2021/22
- the term T1 for fall, T2 for winter, T3 for spring
So for example a full code looks like: ENVS2323A2021/22T1
If the course is not listed in SITS, you can leave this field empty, but students, instructors need to be registered manually.
If there are changes in SITS, with the course code or term, you need to change this code as well, otherwise the connection will be gone.
Optional fields
(you can always check the ? icon next to the settings for more information).
- Course format: Open the sub-menu to change this setting. The default is "topics" format, which means that the sections are marked with " Section 1, 2..." etc. You can select "weekly" format instead, this way the course will automatically calculate dates from the course "start date" for each section.
The students can change between the sections with the "navigation drawer", so they do not have to scroll in long courses.
The single activity format can be handy for special courses, when you only want one activity, like a forum to be in the course. - Summary: A paragraph explaining the “course” (Students and Guests will be able to see this without enrolling to the course). You can copy/paste the relevant summary from your syllabus here. You can also upload “course summary” files if needed (syllabi). This can be really useful, if you would like to share some information with students without SITS registration. You can find more about this at "Possibilities outside a course".
You can restrict CEU users for this summary. The summary info will be also displayed in the footer section of the course.
2. Changes in SITS
 If a course is created in Moodle, and there are changes with it in SITS, you need to implement these changes in Moodle as well.
a) If the Title is changed - you can change the title in Moodle if necessary, but no technical issue will happen if you do not do it.
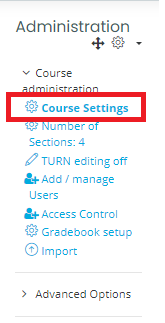
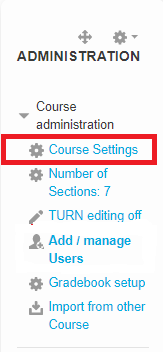
Just open the course > and select course settings in administration, make the changes and > SAVE
b) The course code or Term is changed: You need to change the SITS sync code, or the connection between the two systems will be broken, and students will be unenrolled from Moodle.
For term, make sure that you change the endings of the title and the "categoty" as well.
Just open the course > and select course settings in administration, make the changes for the code and > SAVE
Important: make sure, that you do not copy/paste empty spaces with the code, as it will not work!
You can find this code in SITS called Moodle sync code. The format has a strict logic, so you can always add this code if you know the course code.
The code has 4 parts without any spaces. put together:
- course code: ENVS2323
- a letter indicating the group. For most courses, it is a higher case letter A, if there are multiple groups, for group 2 it is B, for group 3 it is C
- the year 2021/22
- the term T1 for fall, T2 for winter, T3 for spring
So for example a full code looks like: ENVS2323A2021/22T1
If the course is not listed in SITS, you can leave this field empty, but students, instructors need to be registered manually.
If there are changes in SITS, with the course code or term, you need to change this code as well, otherwise the connection will be gone.
3. Course Summary
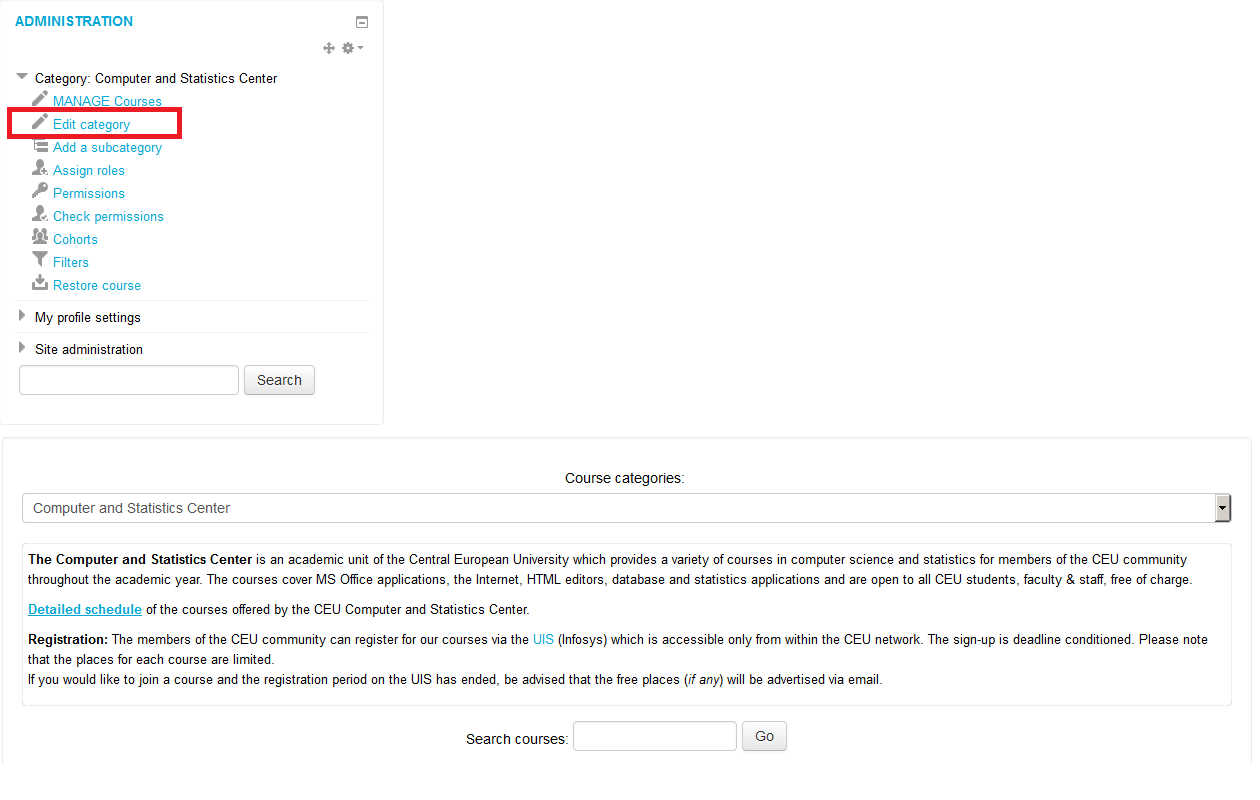
The course "summary" can be edited with "Couse setting link" in the course.
You can write short text into the "course summary" field, and/or upload a file into the "summary files" field. (E.g. Syllabus).
This content will be displayed for Guests and Students who does not have access (enrolled) to the course yet (by default).
You can restrict both individually to CEU users, or course participants.
This summary information and the files are available in the course
footer and also for the selected group in the outside area of the
course. This is the recommended method to share information and syllabus
before the SITS enrollment.
4. Course list in a folder (category)
You can check the enrollment methods of courses quickly if you open the folder, and check the icons next to courses.

Students can see this information without enrollment (syllabus, summary, etc.) before they register in SITS.
Icons next to courses.
![]() Open for CEU students (Self-enrollment): Yes - Students can enroll to the course
manually (if not (yet) registered in SITS). If this is not enabled, the course will tell students “you can not enroll - you will be automatically enrolled
after you register in SITS." If there is a key displayed as well on this window icon, students need to provide a key as well.
Open for CEU students (Self-enrollment): Yes - Students can enroll to the course
manually (if not (yet) registered in SITS). If this is not enabled, the course will tell students “you can not enroll - you will be automatically enrolled
after you register in SITS." If there is a key displayed as well on this window icon, students need to provide a key as well.
![]() Open for External users (Guest access): Yes - (access for non-CEU users without login to the site) is enabled with a key. It the key is not displayed, just the "head" icon, the course is totally open for everyone.
Open for External users (Guest access): Yes - (access for non-CEU users without login to the site) is enabled with a key. It the key is not displayed, just the "head" icon, the course is totally open for everyone.![]() The summary files are always visible, but the summary text info and the professors on the course may be checked with this icon.
The summary files are always visible, but the summary text info and the professors on the course may be checked with this icon.
No SITS sync : You can find the 5 digit "Moodle sync code" at the course details in SITS - this will connect the two systems and students will automatically gain access to Moodle as they register in SITS. This is NOT the course code (LANG 5333 - but a longer one)
You can find this code in SITS called Moodle sync code. The format has a strict logic, so you can always add this code if you know the course code.
The code has 4 parts without any spaces. put together:
- course code: ENVS2323
- a letter indicating the group. For most courses, it is a higher case letter A, if there are multiple groups, for group 2 it is B, for group 3 it is C
- the year 2021/22
- the term T1 for fall, T2 for winter, T3 for spring
So for example a full code looks like: ENVS2323A2021/22T1
If the course is not listed in SITS, you can leave this field empty, but students, instructors need to be registered manually.
If there are changes in SITS, with the course code or term, you need to change this code as well, otherwise the connection will be gone.
If you can not assign this code, please contact me.
No teachers assigned to this course: No professors are on this course with teacher roles. Note: Teacher assistants and/or coordinators may have access to the course.
How to assign a co-teacher or TA?
5. External users / users not created (yet)
1. If you can not find a name as you would like to assign him to a course in Moodle, but this user has an MS username, it means that this user never logged in to Moodle.
All accounts will be created as the user logs in to Moodle. If the MS access is expired, you need to renew it (in the IT system) in order to give access.
If you would like an account to be created before this first access, please write an email to acsg@ceu.edu.
2. If someone will not get a CEU Microsoft account, we can create an external account for him in Moodle.
If you never done this, you need to ask for user creation rights.
Please note, that the Compliance with data protection rules (including the applicable laws) is the responsibility of all Members of CEU Community who process personal data. Make sure, that the users you upload to the site gave consent to the storage, management and processing of their personal data. Make sure that personal data is kept only for the period that is required to fulfill the purposes it has been collected for.
The full Data Protection Policy of CEU is available here: https://documents.ceu.edu/documents/p-1805
Two methods are available for the user creation:I. Upload the new users with a CSV file
- The accounts are created automatically and immediately
- Emails are sent to the new users
- Email addresses, and names are needed in an excel (CSV) file
- It is more complicated to create the file correctly, but it is easier to handle a large amount of users
- An Invitation is created, the users need to register to get accounts
- You can decide if you want the system to send an automatic email or you can invite the users yourself
- Only email addresses are needed
- It is really easy to invite the users, but large amount of users are harder to handle
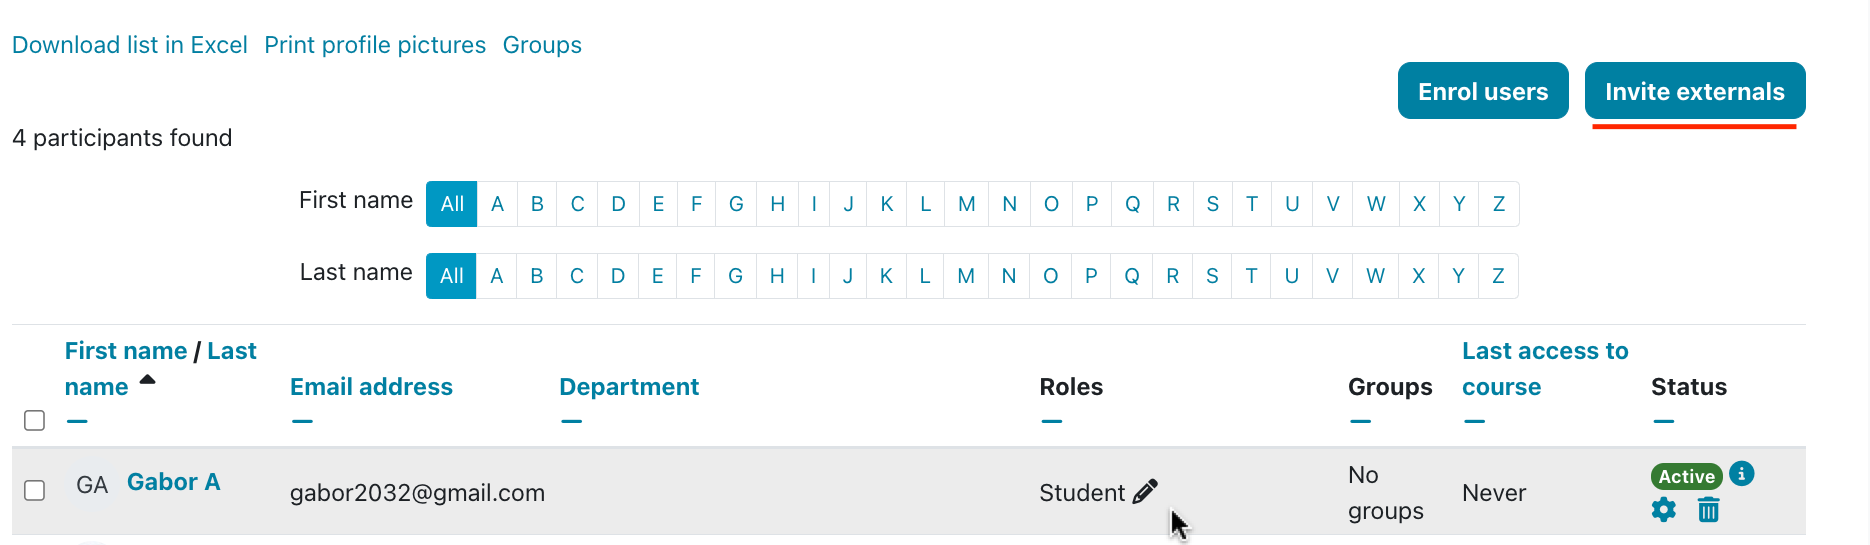
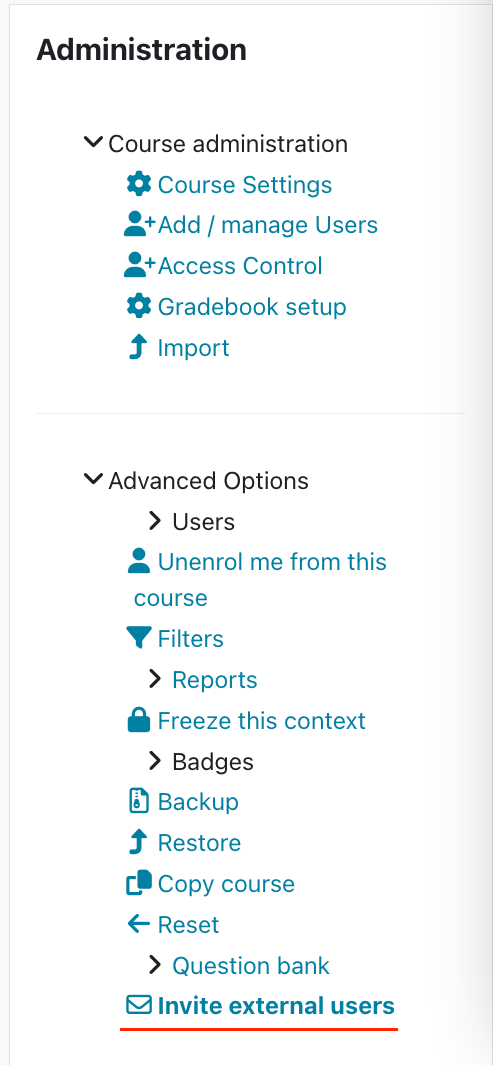
5.1. External user creation - Invitation method
Invitation
 |
 |
|---|
- Create an account for CEU users who did not log in to Moodle yet, and assign the account to the course
- Enroll existing users in bulk (both CEU and external)

- No more than 100 users can be invited - for a large number of users it is recommended to use the csv upload method
- Only active CEU accounts can be invited, if the MS account is not active (either not yet activated or an alumni account), the invitation will not happen. Either the account needs to be activated by IT or use an external email address (but only if the user will not get an MS account later)
- Avoid duplicating accounts for the same user, do not invite external users with multiple email addresses and only create external accounts for CEU users when absolutely necessary
5.2. External user creation - CSV method
I. Fill out this sample CSV file: sample_user_creation.csv
Each new user needs to be in a new line in the csv.
No fields may contain special accented characters like á, í, ú - you need to trim these for account creation.
username: The user will use this username to log in to the Moodle instance. It needs to be unique. A user's name can only contain alphabetical letters in lowercase, numbers, hyphen
course1: Copy/paste the "short name" of your course into this cell to add the user to the course when created. Make sure that there are no space characters before or after the name. If this is not necessary, you can delete this column. If the user is created, you can assign it to your course manually as well.
role1: student or teacher
Passwords will be created automatically upon creation and sent as an automatic email to the new user (along with the username and site URL). Note: some email providers (hotmail for example) may block or put this email into their spam folders rarely.
II. Upload the CSV file here (administration > users > accounts > upload users.
Direct link: https://ceulearning.ceu.edu/admin/tool/uploaduser/index.php
You just need to drag and drop the csv into the field and click on the "upload users" button. You will see a preview that will indicate if there are any problems with the csv file you need to correct first.
Do not change any of the default settings just click on "upload users".
Detailed help
III. The users are ready, check if they are listed on the participants' page of your course. Contact me if you have any problems.
6. Folder Summary
You can add some general information about your department which will be displayed before the Category / Course list.
This can be used to store important links, files, etc.
If you would like to store files here (Student handbook, a Collection of all Syllabus, etc.), please ask for a Repository at acsg@ceu.edu